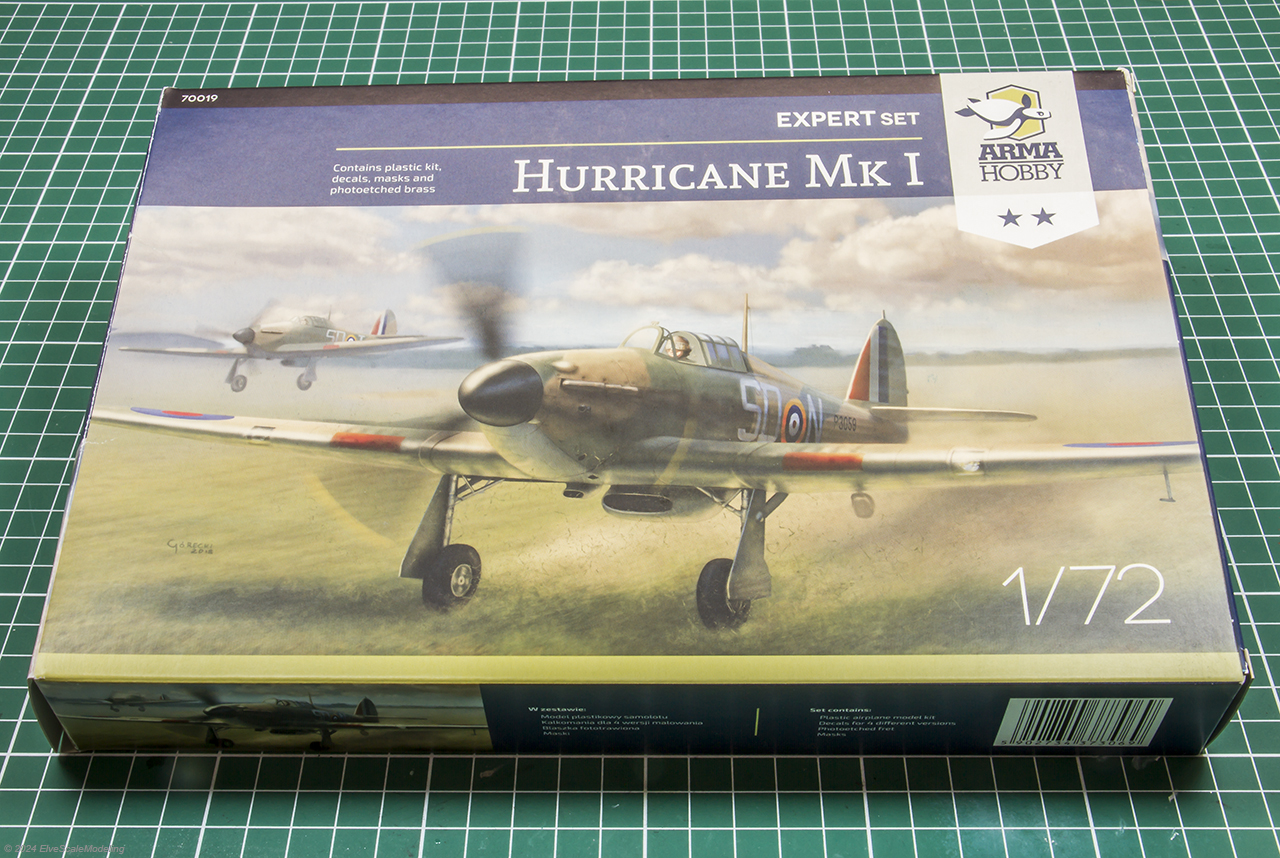
Recently, I build the Arma Hobby 1/72 scale Hurricane Mk I. The Hawker Hurricane is often overshadowed by the Spitfire in popular history, but it was actually the workhorse of the Royal Air Force during the early days of World War II. First flown in 1935 and officially entering service in 1937, the Hurricane played a critical role in defending Great Britain during its darkest hours. The model I chose to build represents Hurricane R4175/RF-R, flown by Sergeant Josef František of the 303 Polish Squadron RAF. This squadron was one of the most successful units during the Battle of Britain, and Sgt. František was its top ace. In fact, during the battle, he scored 7 of his 17 confirmed aerial victories. Tragically, he lost his life on October 8th, 1940, when he crashed during a routine patrol flight.
The first impression of the kit was great. The box artwork of a scrambling Hurricane really looks stunning. Inside the envelope-style box, I found finely molded plastic parts with crisp surface detail. A small but valuable photo-etched fret for cockpit enhancements, high-quality decals, and clear, full-color instructions.
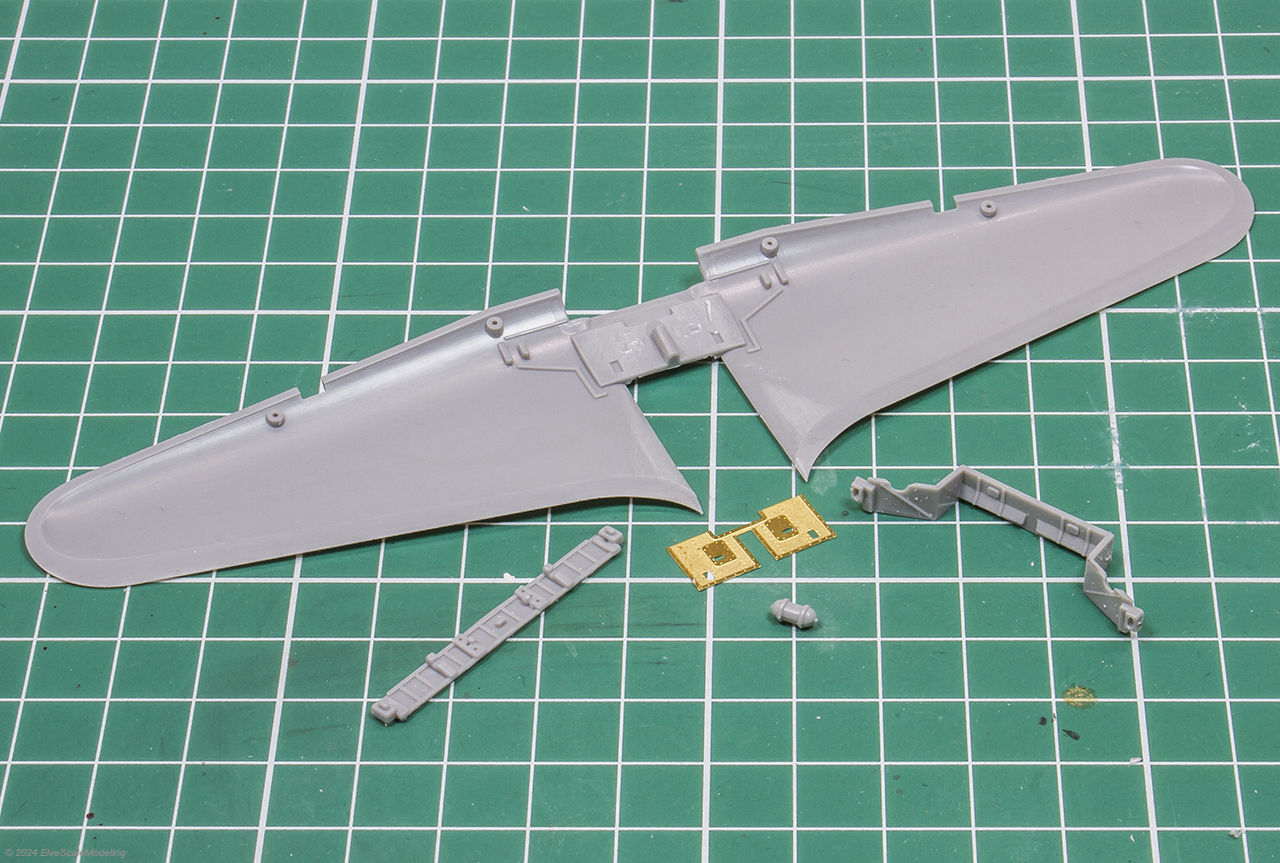
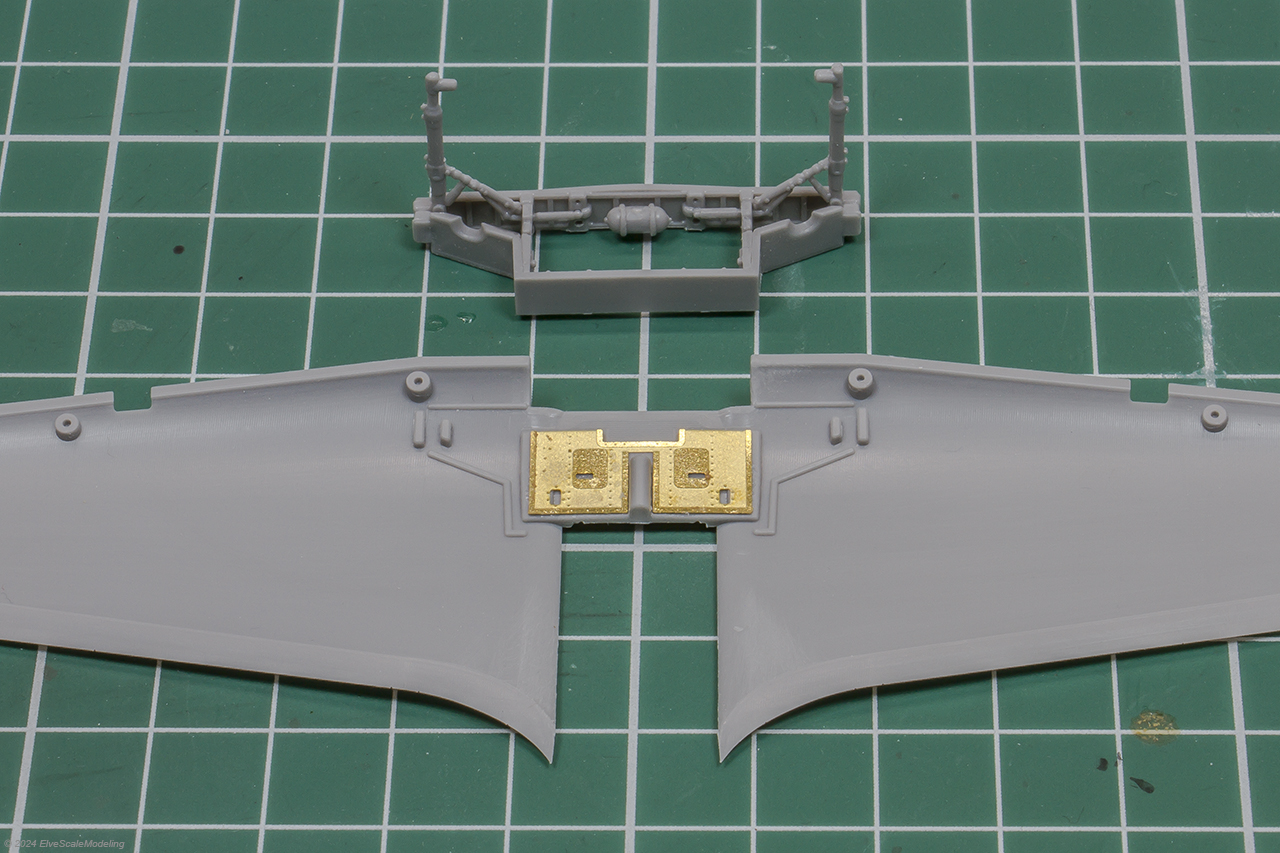
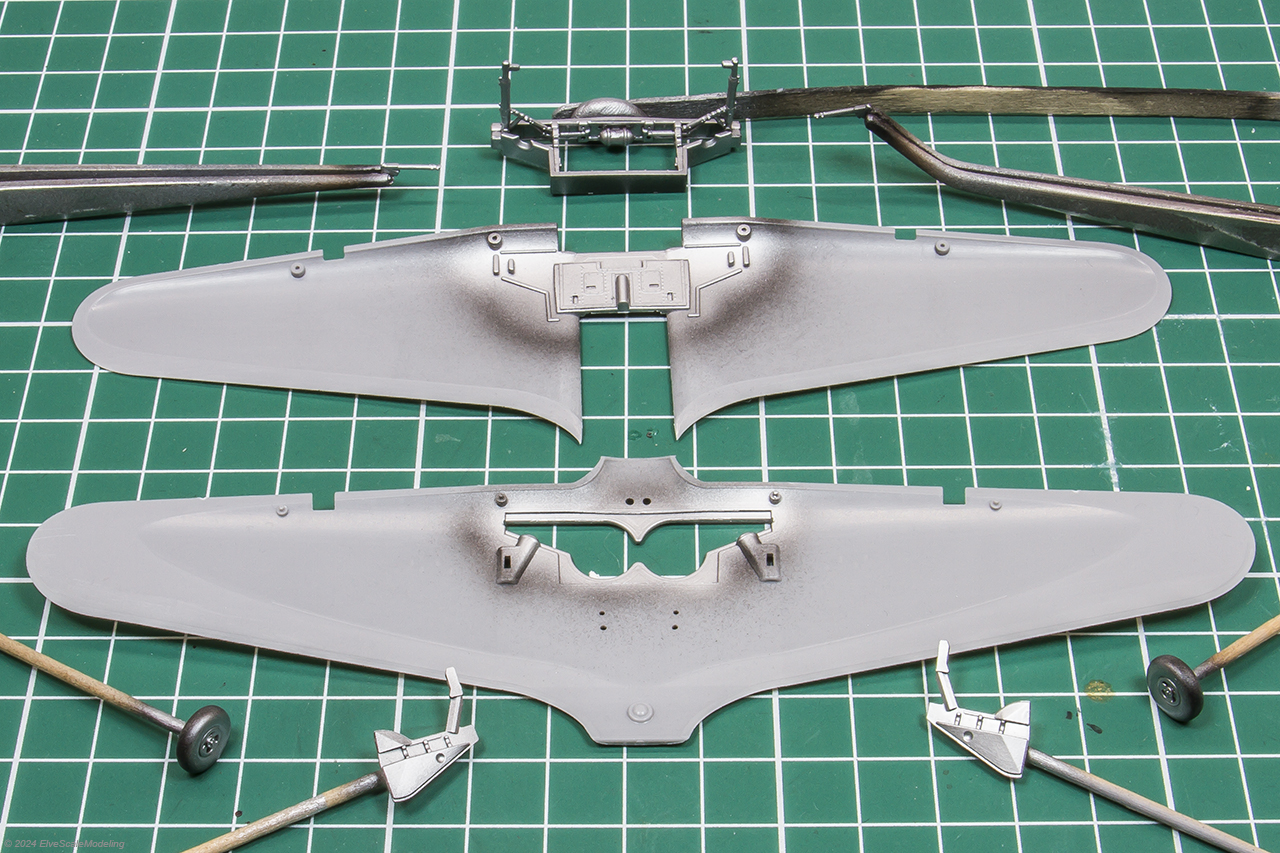
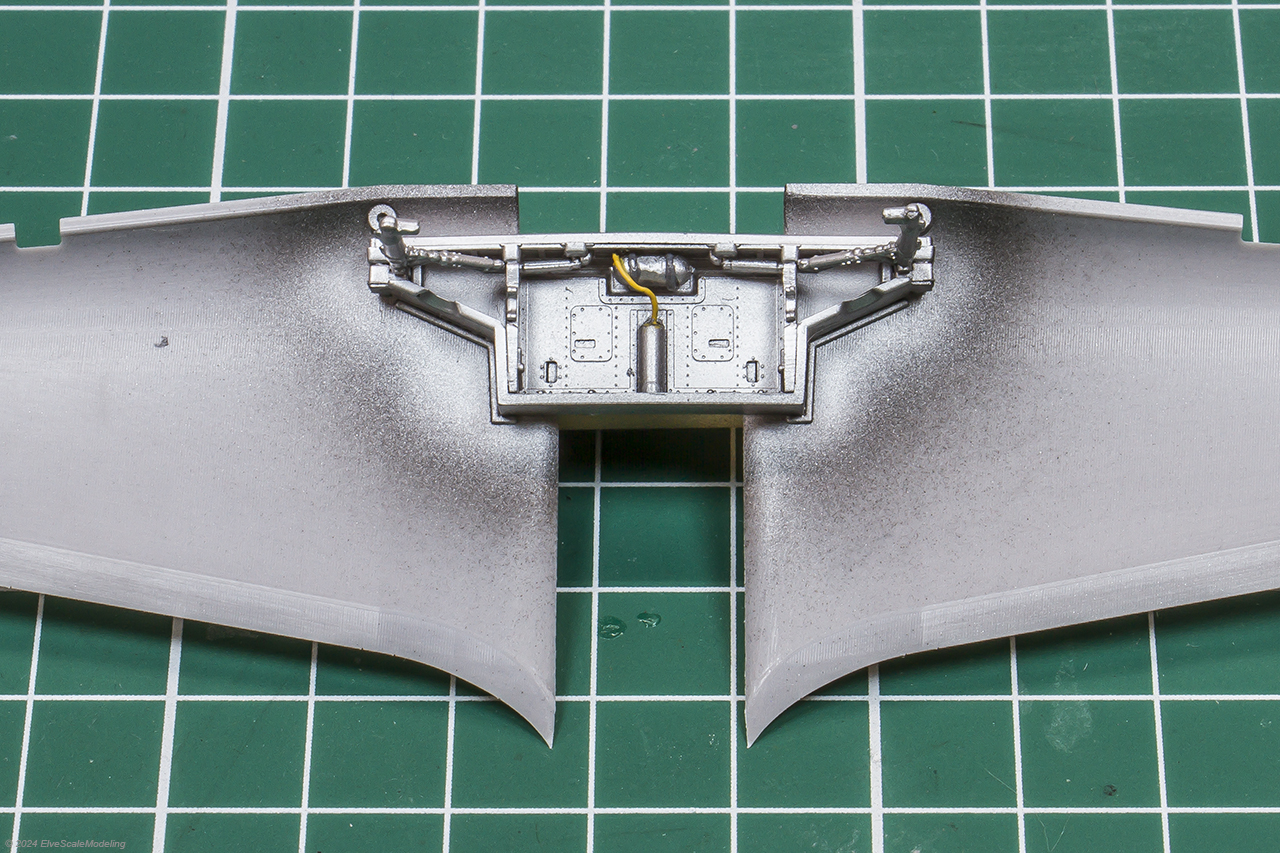
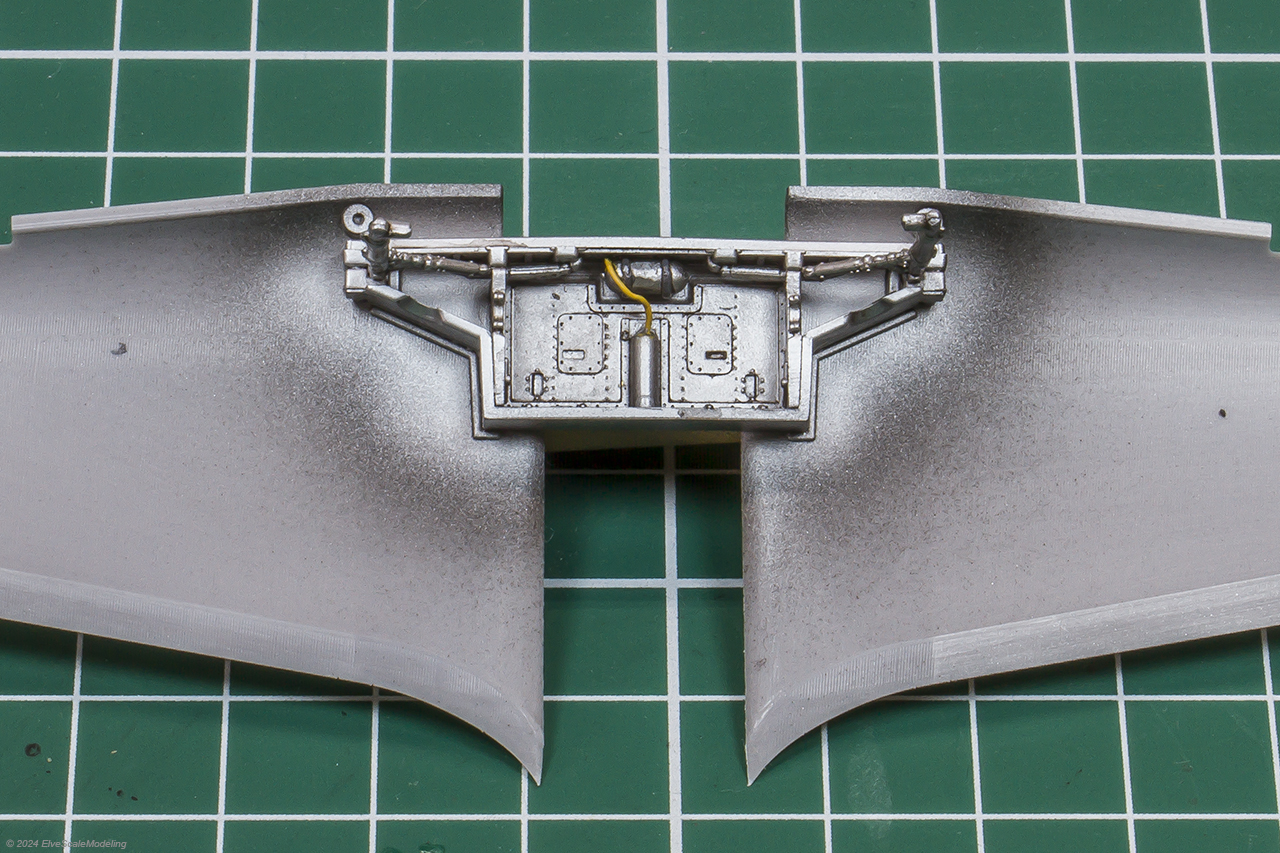
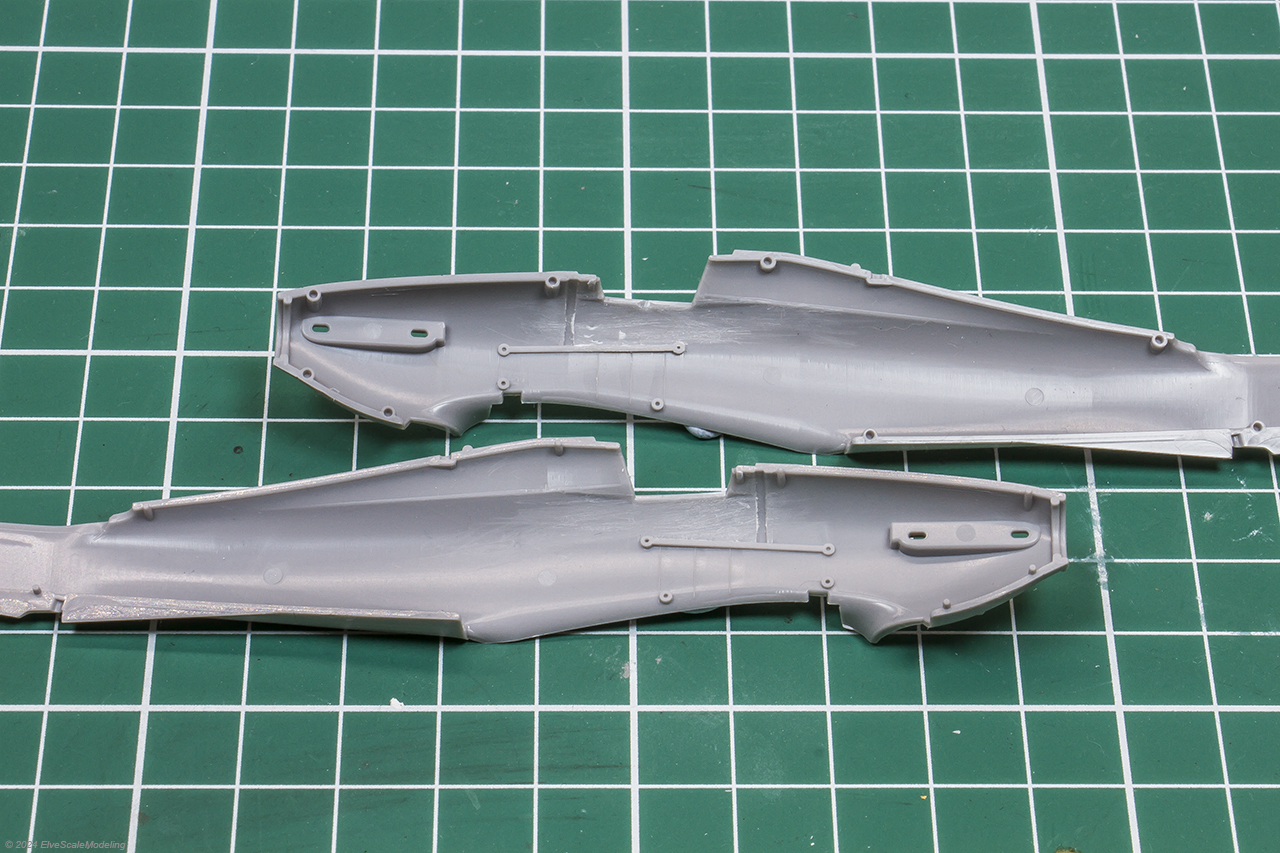
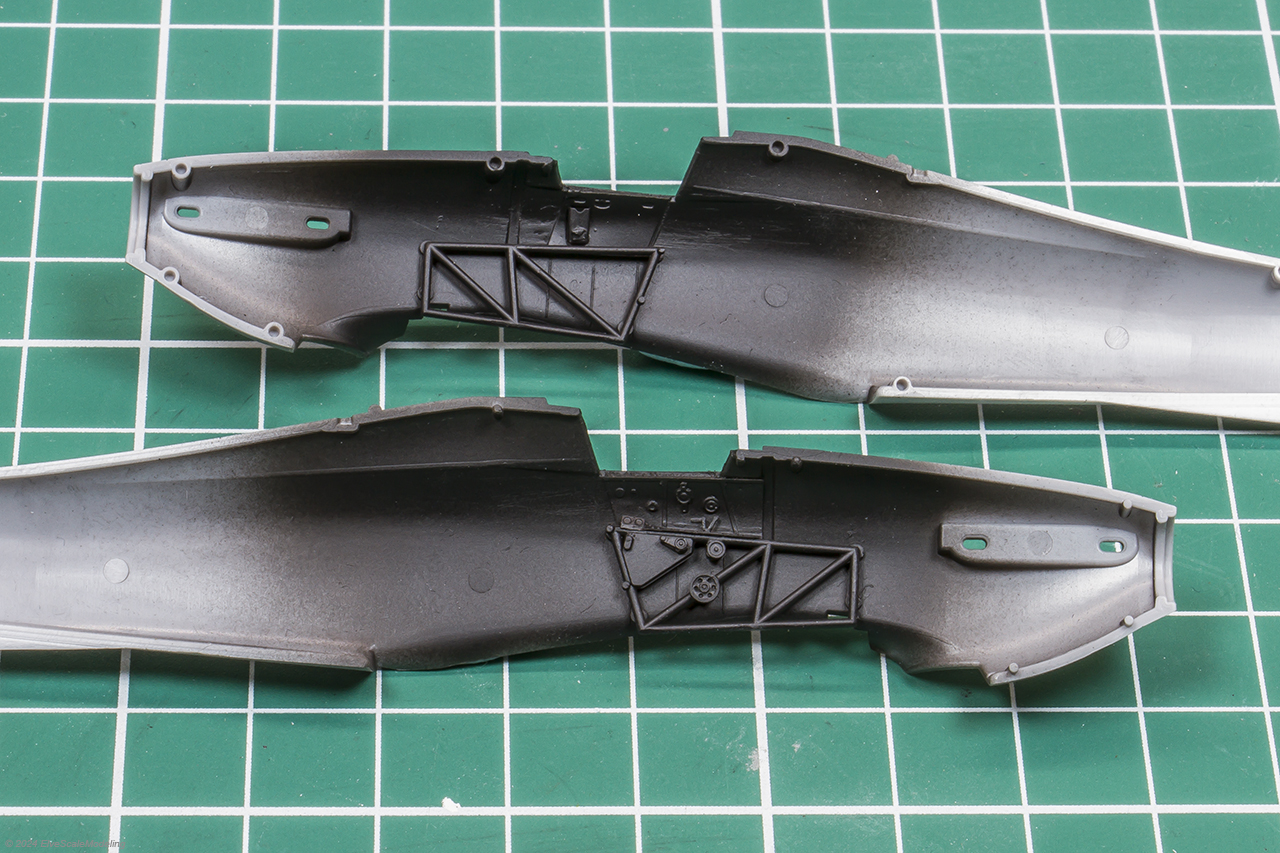
The wheelbays and wings
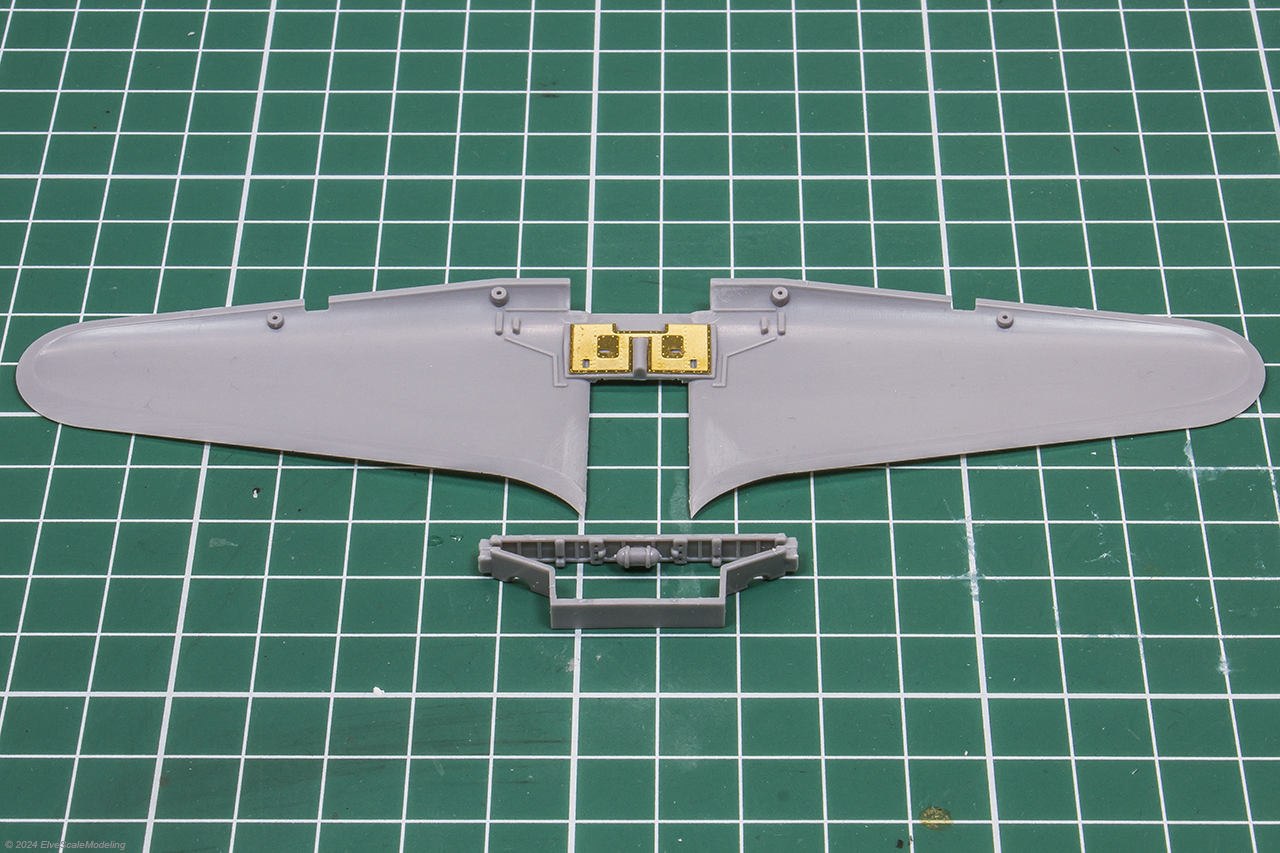
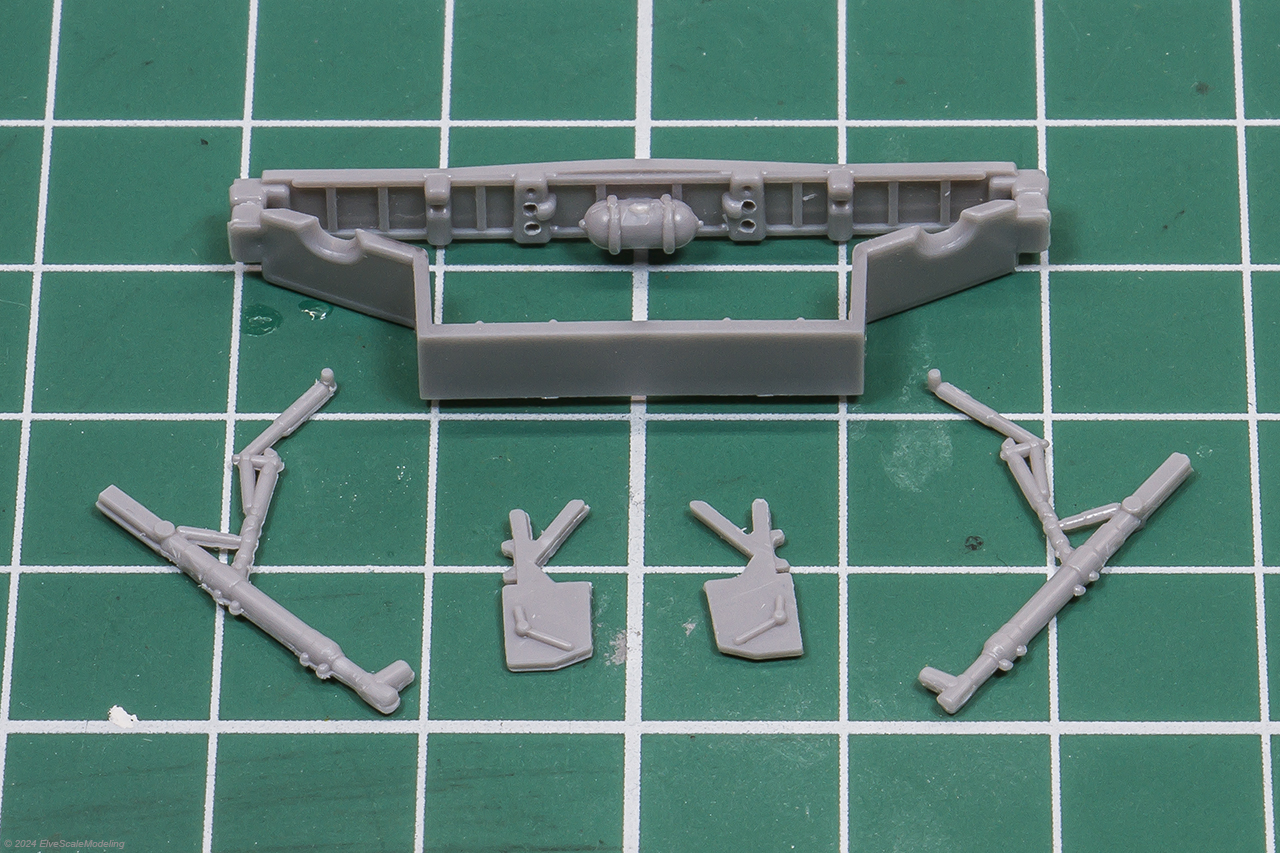
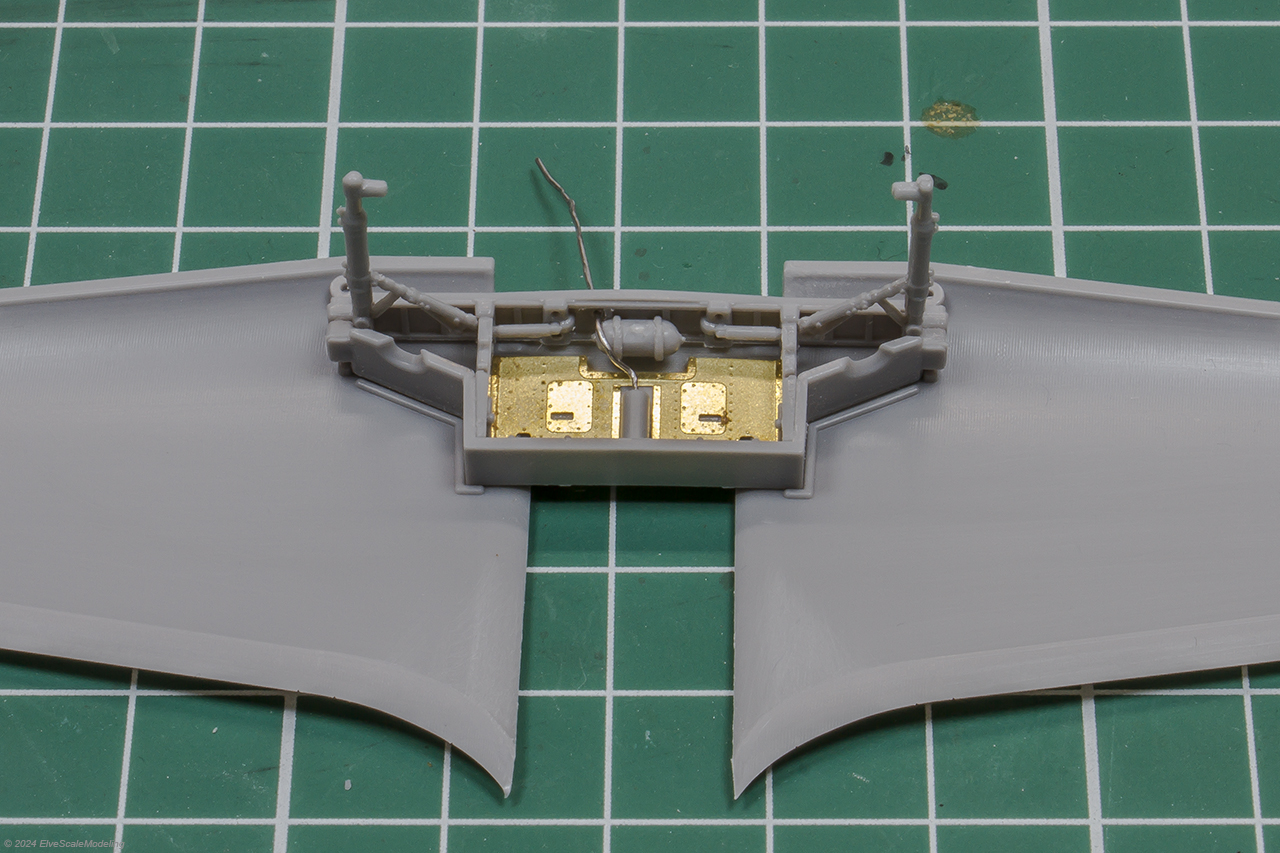
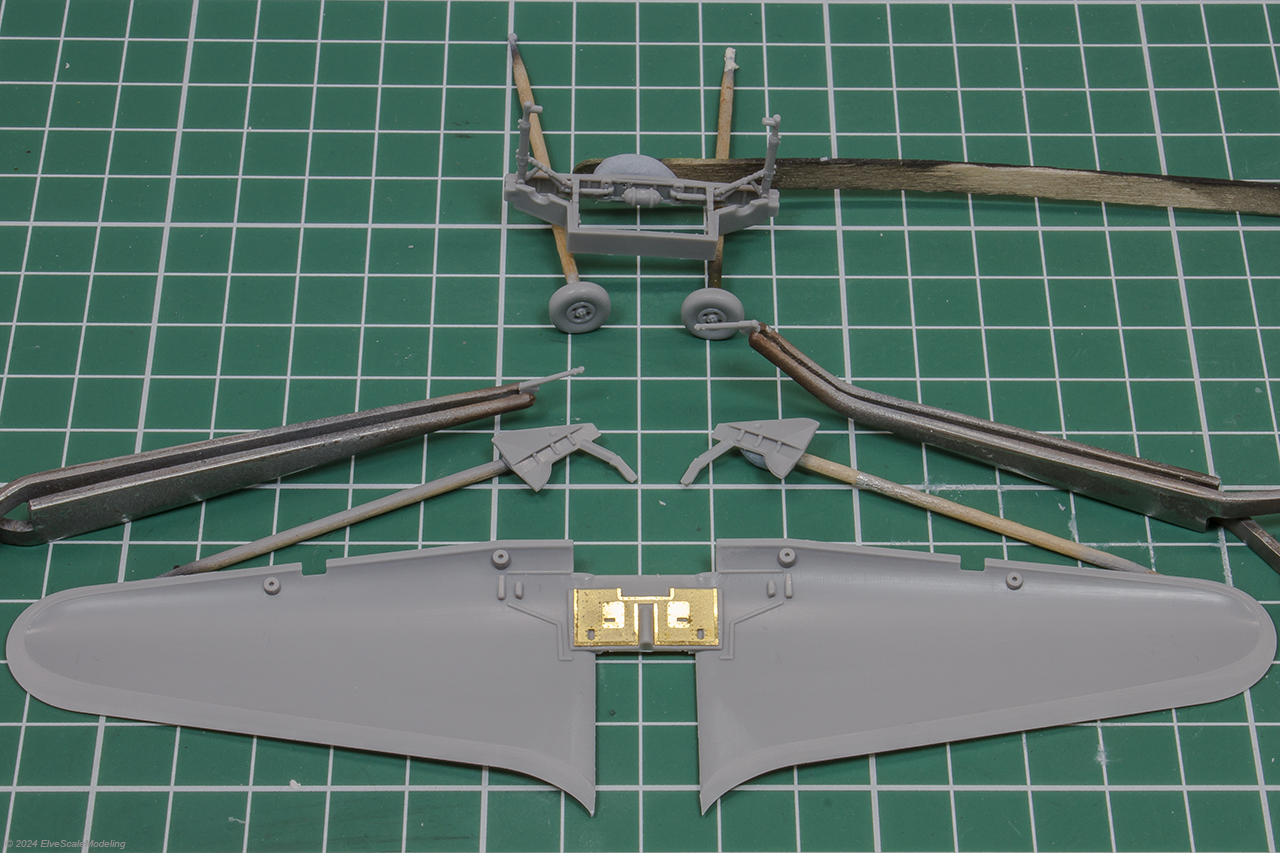
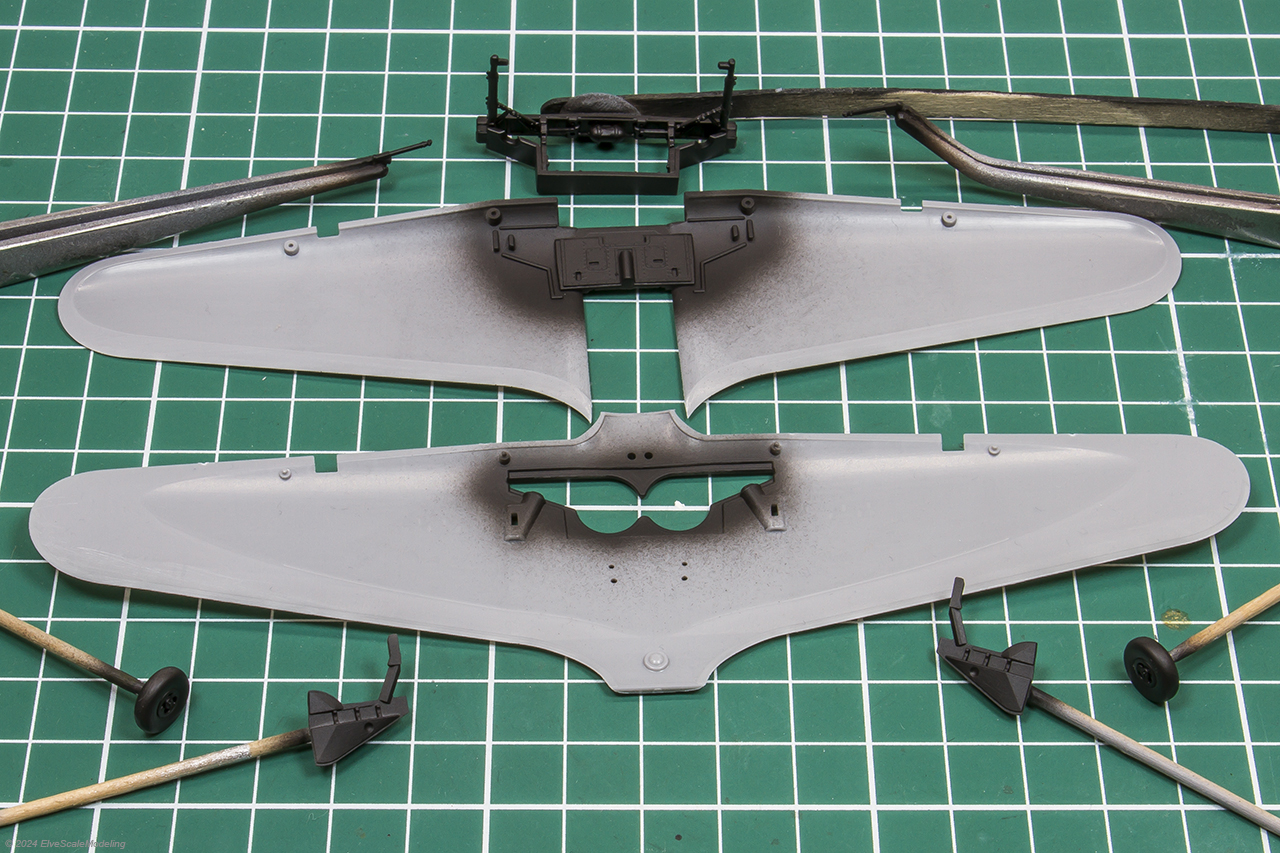
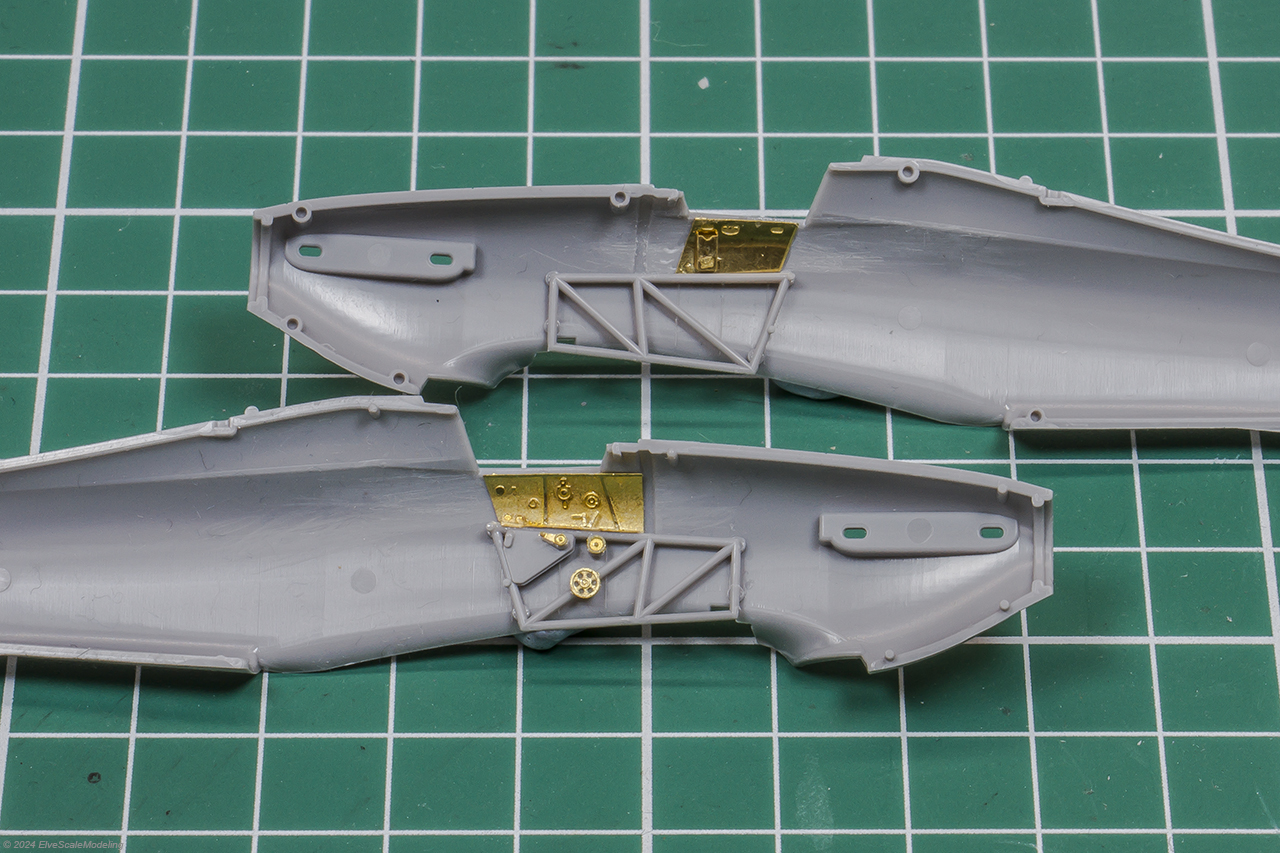
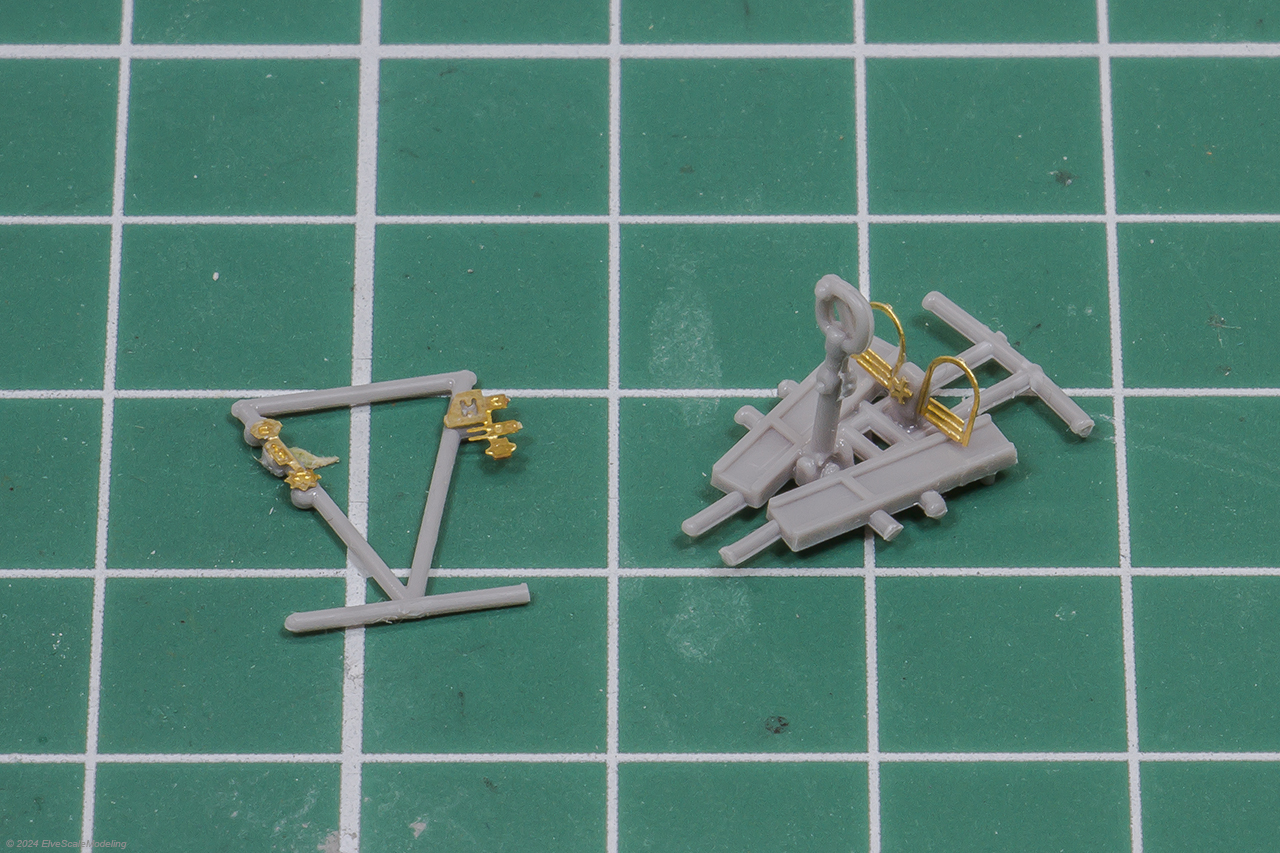
Unlike most model kits, the Arma Hobby 1/72 Hurricane Mk I build doesn’t begin with the cockpit. Instead, the instructions let you to start with the wings and wheel bays. I began by carefully cutting all necessary parts from the sprues and photo etched fret, assembling everything step by step according to the instructions. I also added a bit of extra detail by scratch building a hydraulic line using lead wire.
Once the major components were glued together, I dry fitted everything to check alignment before painting. For the painting process, I applied a base coat of Mr. Surfacer 1500 Black as a primer. Followed by Alclad II Aluminum. After it dried, I hand painted the smaller details and applied a brown wash to bring out the small details.
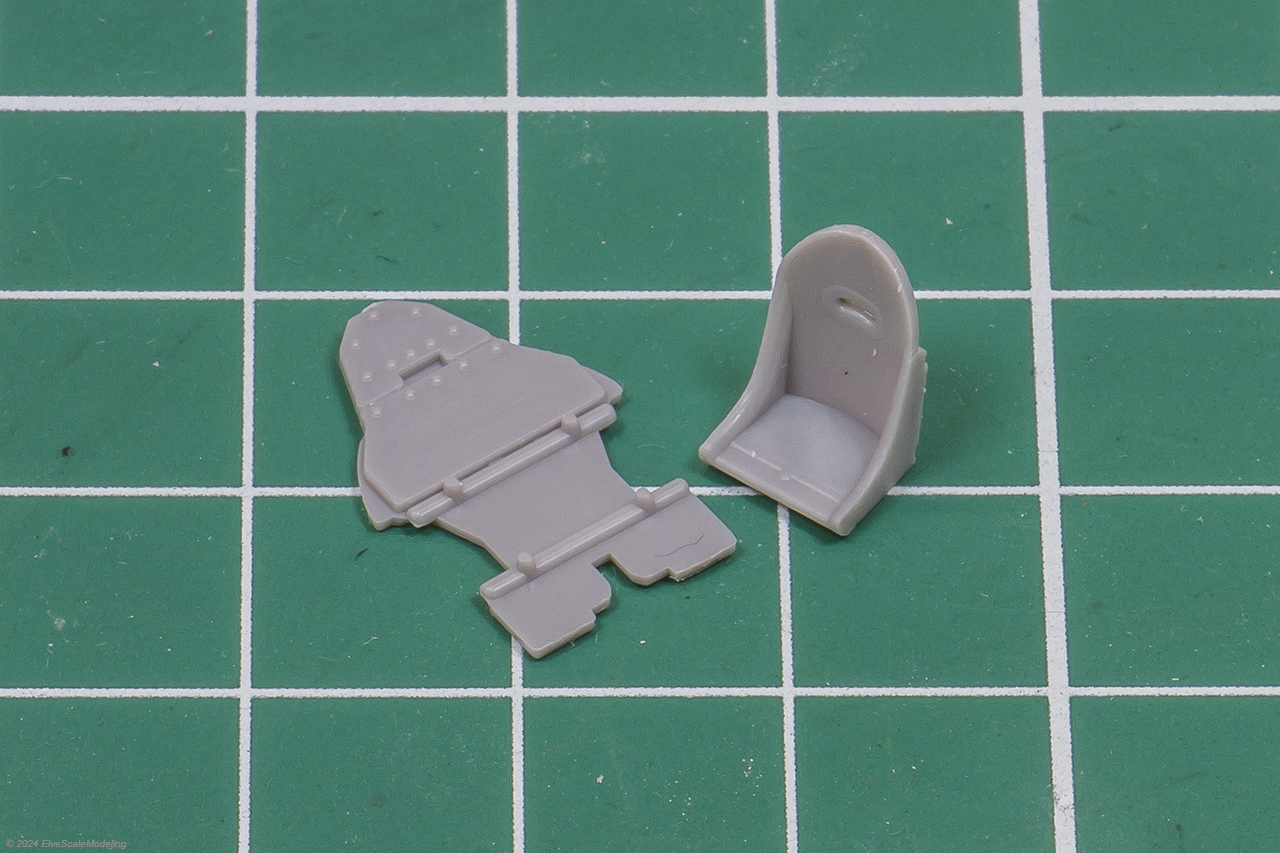
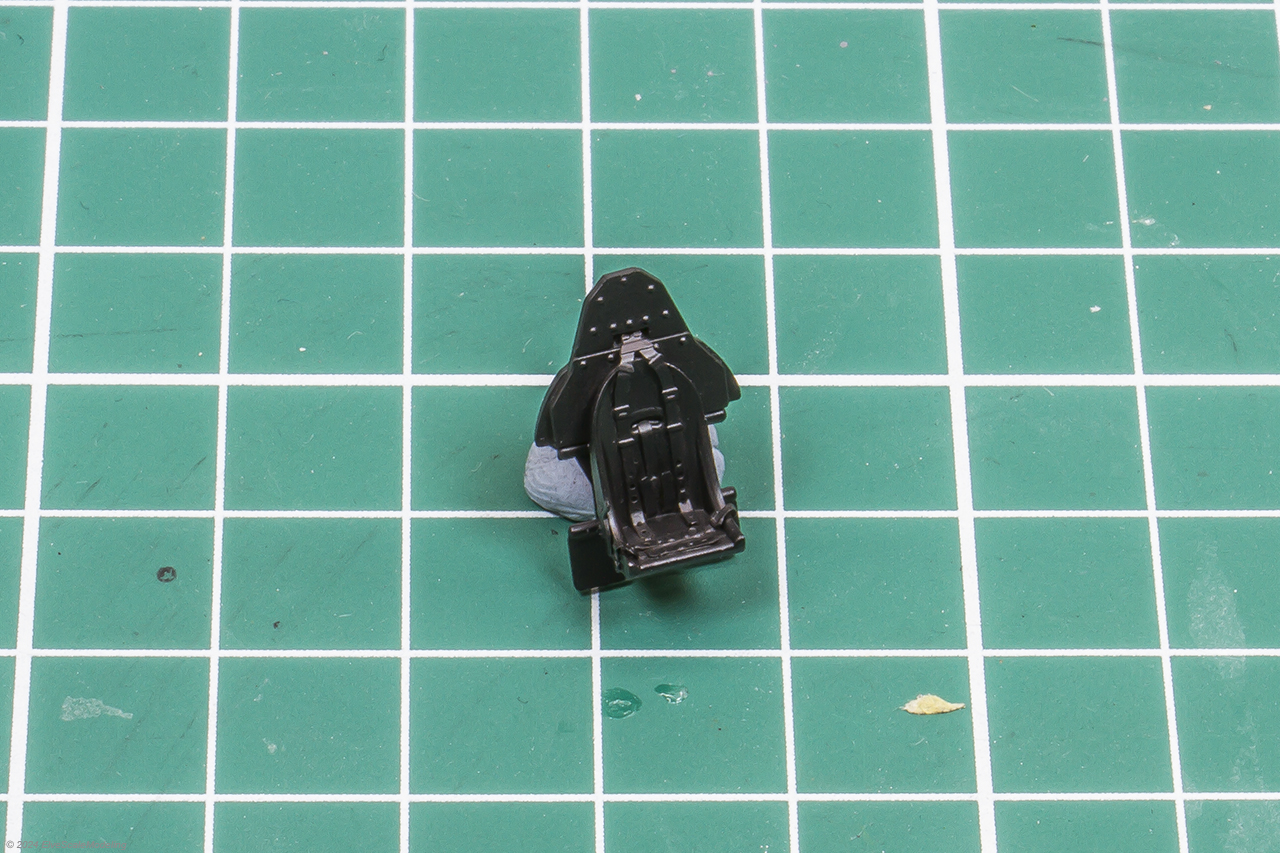
Assembling the cockpit
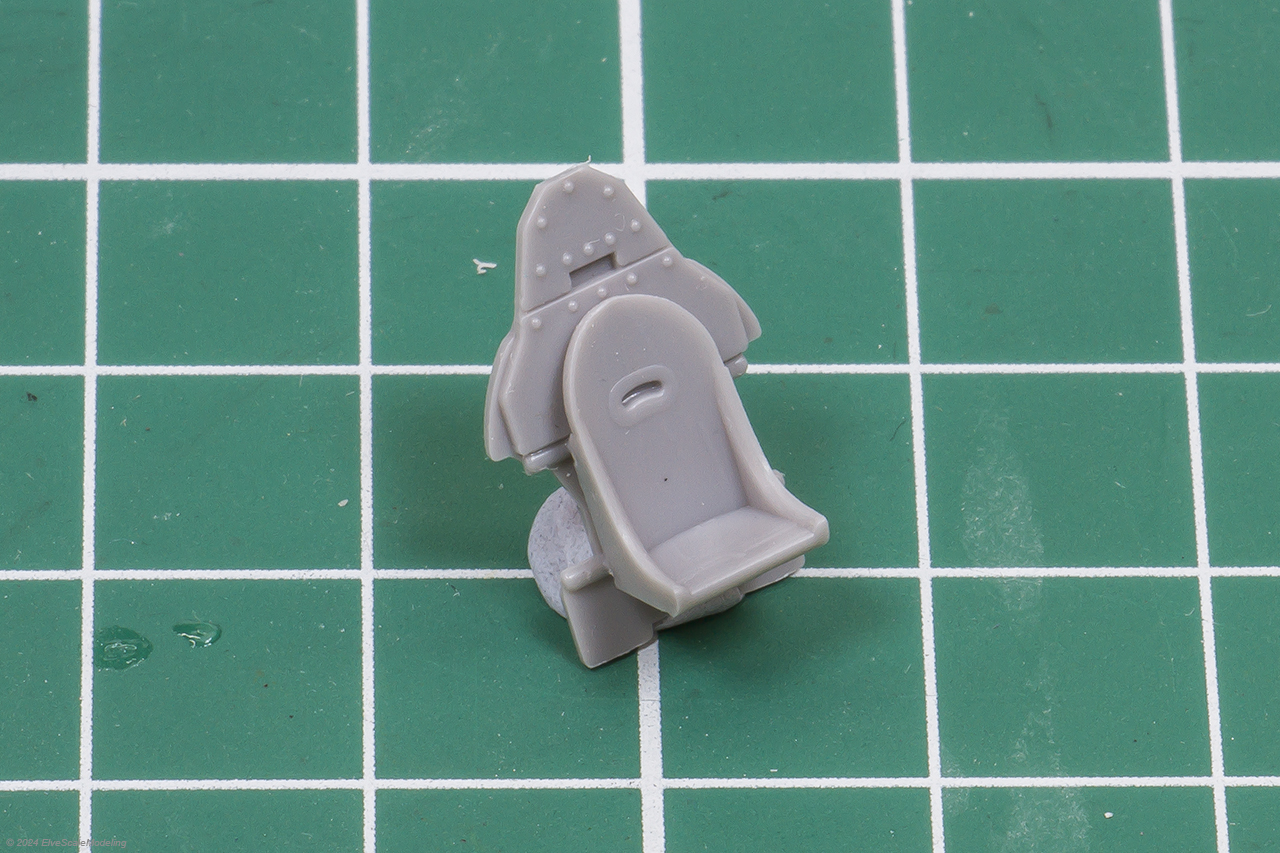
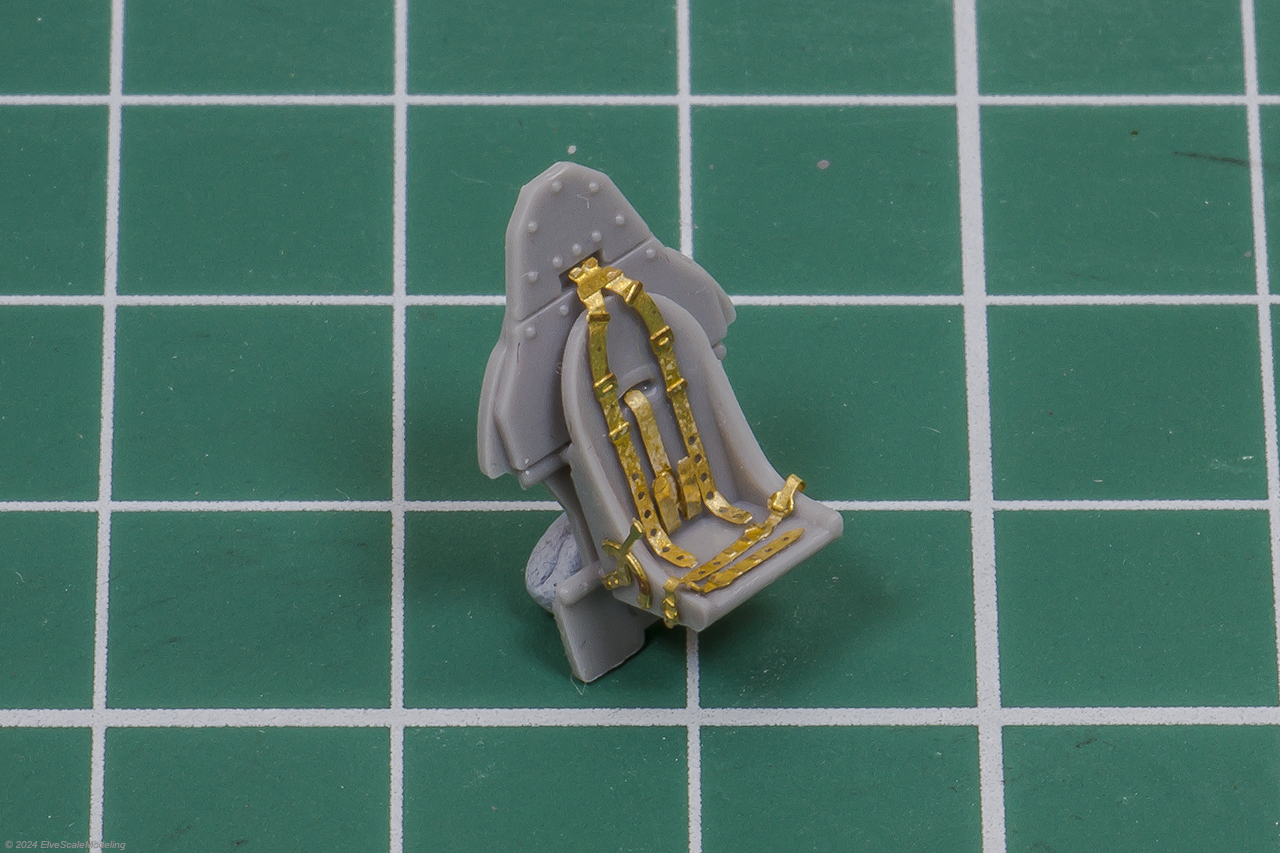
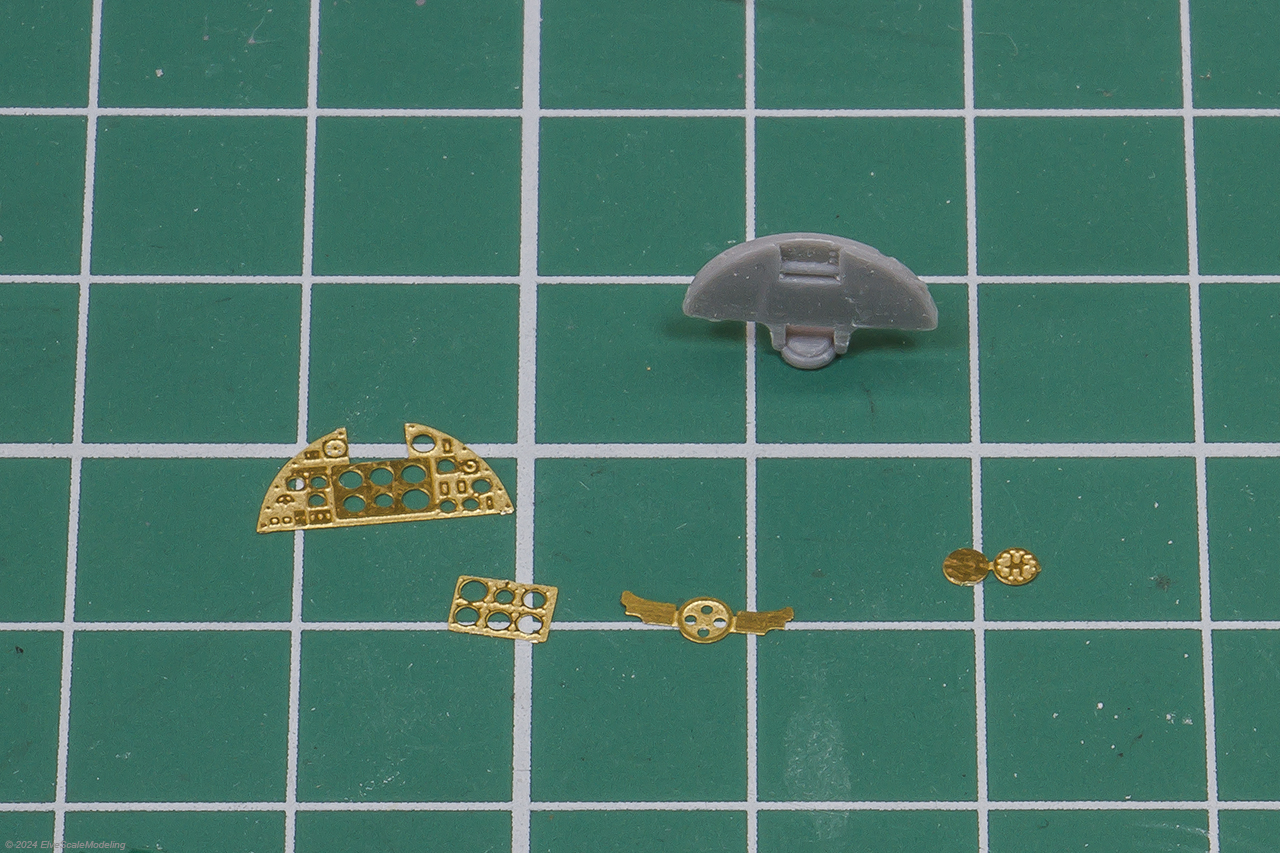
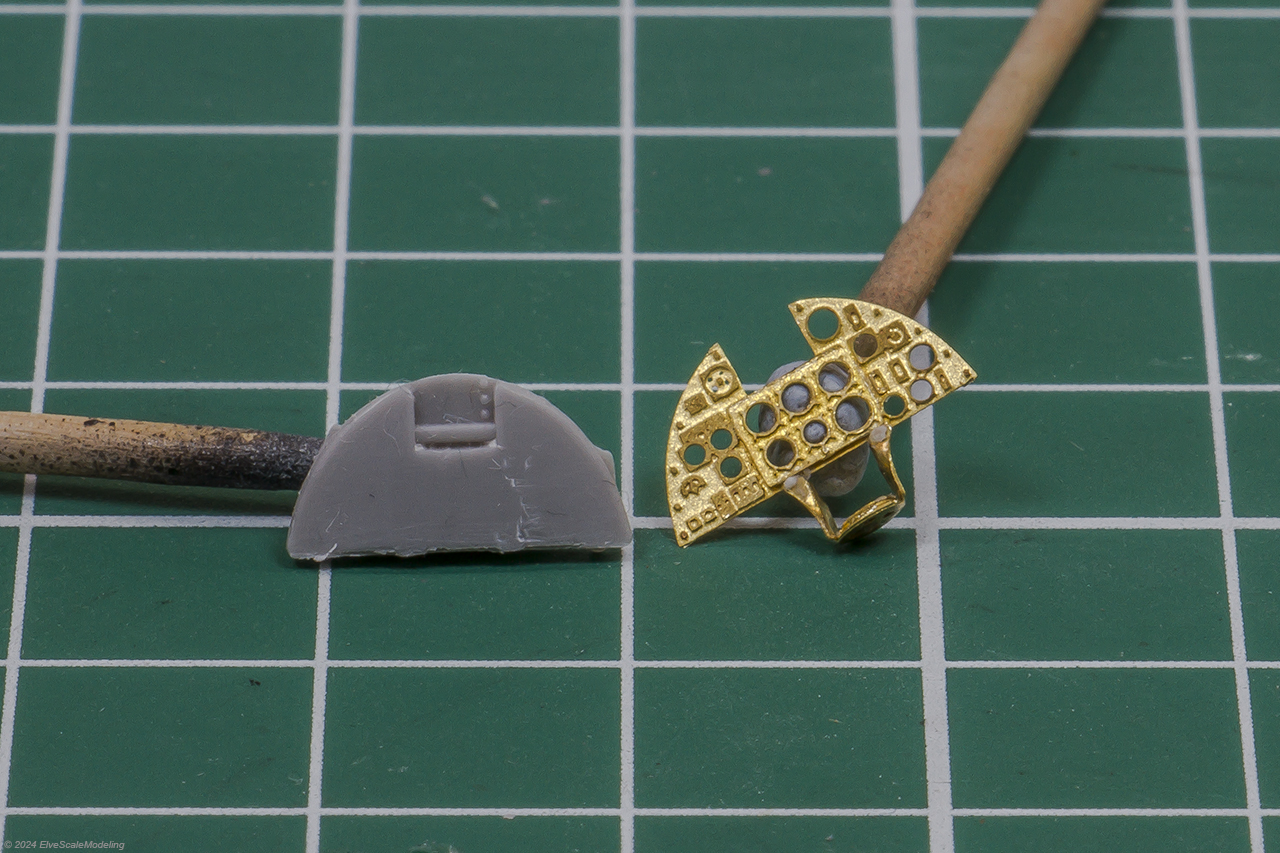
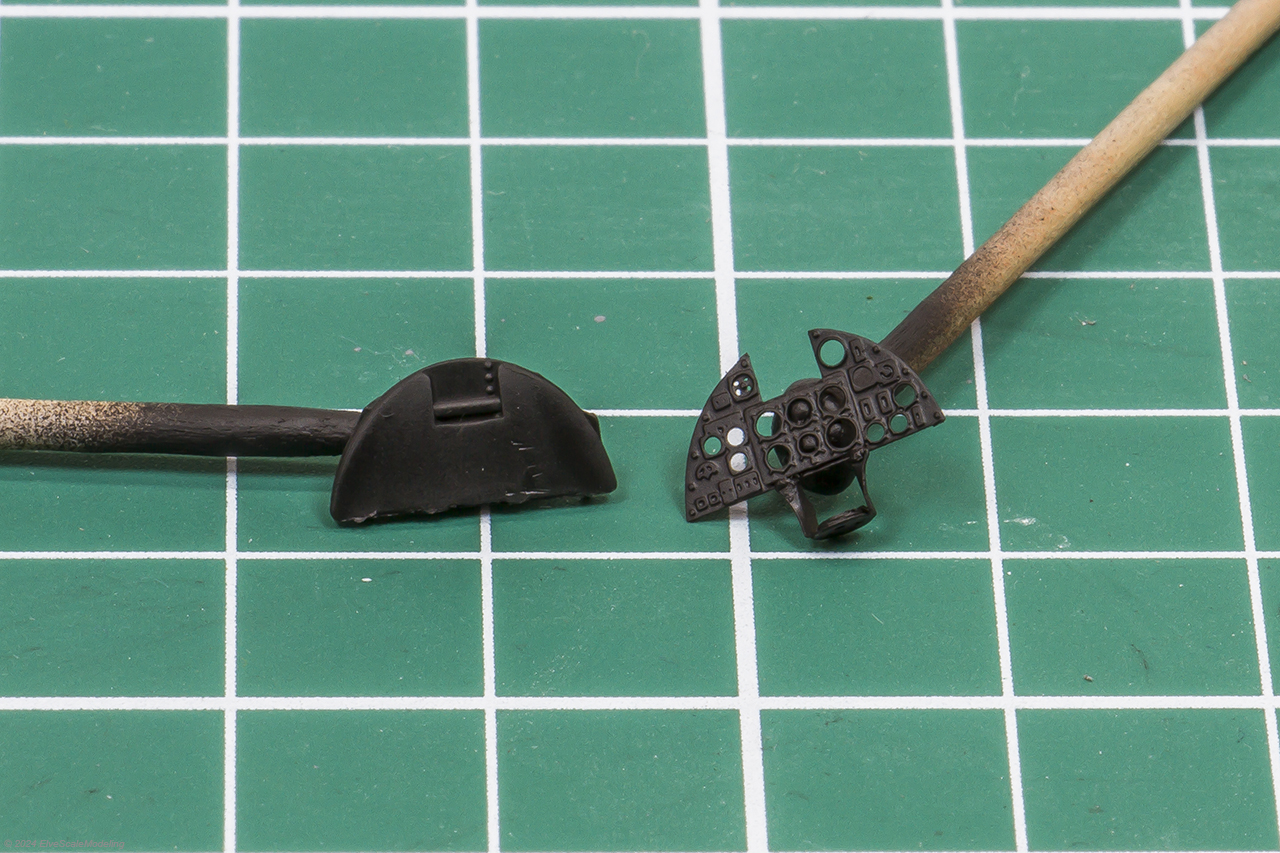
With the wings and wheel bays completed, I moved on to building the cockpit. I began by removing the interior detail on the fuselage sides. Followed by assembling the smaller components that attach to the fuselage sides. The seat assembly was straightforward. I cut the parts from the sprues, cleaned them up and glued them together. Lastly i added the photo-etched seatbelts. For the instrument panel, I decided to sand off the molded detail and replace it with the kits photo-etched version. I applied the same approach to the lower cockpit section, removing the raised plastic details and upgrading them with photo-etched components. These Photo-eteched parts really boosted the interior and added some great detail to the cockpit.
Painting the cockpit
I began the painting of the cockpit with a base layer using Mr. Surfacer 1500 Black as the primer. This provided an solid layer for the rest of the painting. Once the primer was completely dry, I moved on to spraying all the cockpit parts with Tamiya XF-71 Cockpit Green. After allowing the paint to cure thoroughly, I began hand-painting the finer interior components using a fine brush. I carefully followed the kit’s instructions and cross-referenced several reference photos to ensure accuracy and realism.For the instrument panel, I used the kit-supplied decal, which added great detail without extra effort.
After the main painting was complete, I sealed everything with a layer of gloss varnish to protect the paint and prepare the surfaces for weathering. Once the varnish dried, I applied a brown wash to bring out the recessed details and add some depth and contrast to the cockpit. To finish it off, I sealed all the layers with a flat varnish, giving the cockpit a realistic, matte appearance that ties everything together.


Cockpit assembly
With the cockpit painting complete, it was time to glue the cockpit parts into the fuselage halves. This stage requires careful alignment, something I quickly realized is absolutely crucial. I learned the hard way that if the cockpit components aren’t seated perfectly, you’ll run into issues when trying to close up the fuselage.
After making the necessary adjustments, I glued the fuselage halves together, ensuring everything was aligned properly. With that done, it was time to attach the fuselage to the wing assembly. The lower cockpit section, including the control stick and rudder pedals, had already been fixed to the wing. Aligning these parts also required a lot of patience.
My biggest tip here: take your time and dry-fit every piece thoroughly before applying glue. A good fit here makes a huge difference in the overall alignment and finish of the model.


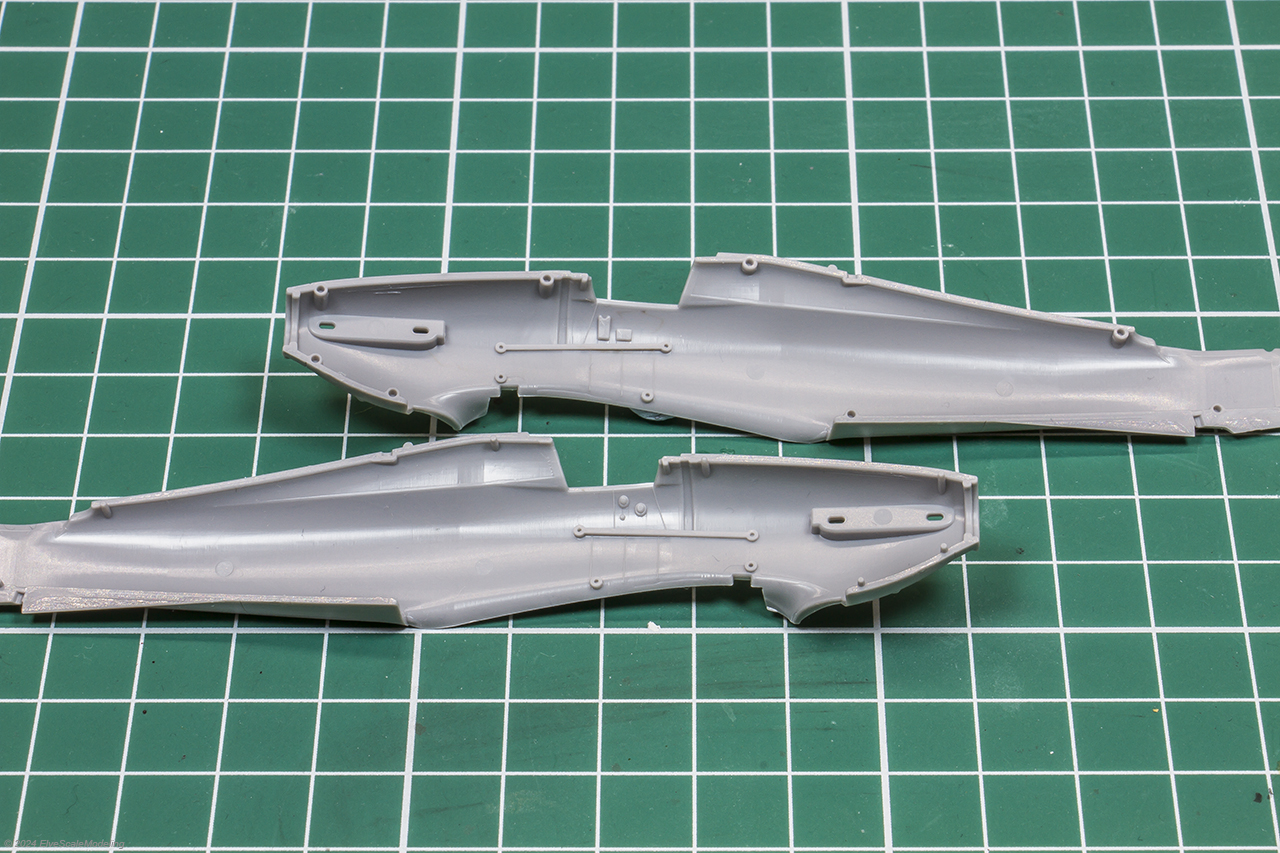
Fuselage assembly
With the fuselage closed and attached to the wing, I moved on to assembling the remaining parts. I began by cleaning up all the small pieces after removing them from the sprue. Next, I glued the horizontal stabilizers and rudder togheter, positioning the rudder slightly dropped. As most of the reference photos of Hurricanes i found show the rudder like this when parked. Once set, I attached the assembly to the fuselage. Lastly, I removed the molded navigation lights, as I plan to replace them with clear parts later in the build.


Before I could begin painting the exterior, there were a few final steps to complete. I started by attaching the photo-etched hand grips to the canopy. Once secured, I dipped the canopy in AK Interactive Gauzy Agent to give it a realistic, glass like finish. After it dried, I masked the canopy with the kit supplied mask and sprayed it with Tamiya XF-71 Cockpit Green to match the interior color. I then glued the forward section of the canopy in place. With that done, I masked off all areas that shouldn’t be painted in the exterior colors, making sure everything was ready for painting.


Painting
With all the parts assembled and masked, it was finally time to start painting. I began with a black primer coat using Mr. Surfacer 1500 Black, which gave me a solid base and helped reveal any seam lines. Once it dried, I carefully checked for flaws and fixed any issues.
For the first color, I sprayed the underside with Mr. Hobby H74 Sky. After allowing it to dry, I masked the underside in preparation for the next painting steps. On the top side of the fuselage, I sketched the camouflage pattern in pencil, preparing this for the next camoflage colors.


Painting the camoflage
With the underside finished, it was time to move on to the topside camouflage. I started with the first brown shade, spraying Mr. Hobby H72 Dark Earth as the base color. Once the main coat was down, I mixed in a little Mr. Hobby H27 Tan true the base coat to create subtle highlights in the panel centre’s. While the highlights are visible in person, they don’t show up as strongly in photos.
After the brown tones had fully dried, I carefully masked off the Dark Earth areas to prepare the model for the second camouflage color.


For the second camouflage shade, I airbrushed Mr. Hobby H330 Dark Green, which paired nicely with the Dark Earth base. To create some tonal variation, I mixed in a few drops of Mr. Hobby H4 Yellow and applied subtle highlights on the panels centers.
Once the green had dried, I carefully removed all the masking, revealing the full camouflage scheme. Overall, I’m really happy with how the paintwork turned out. Altough, I do feel the brown tone came out a little lighter than I intended. To fix this, I plan to use filters later in the build to deepen the shade and achieve a more realistic finish.


Enhancing some details
To enhance realism, I decided to alter the colors of the fabric-covered areas so they would get some tonal variation from the ribs. I masked off the ribs with thin strips of tape and then misted a light coat of Tamiya X-19 Smoke over the control surfaces. This created subtle tonal variation that in my opinion makes the model look more intresting.
While working on this step, I also painted the wheels and propeller parts, making sure all the details were covered. Once everything had dried thoroughly, I sealed the paintwork with a gloss varnish, getting the model ready for the decaling stage.


Decalling and Weathering
With the paintwork sealed, I moved on to applying the decals. They were quite thick, so I had to use a lot of Microscale Set and Sol to get them to conform properly into the panel lines. Once the decals had settled, I sealed them with another coat of gloss varnish before moving on to the weathering.
For the panel line washes, I used different tones for contrast: on the underside I applied Abteilung 502 Payne’s Grey, thinned with odorless thinner, while on the topside I used Abteilung 502 Shadow Brown.
To replicate the look of the fabric-covered rear fuselage, I highlighted the ribs by drawing fine lines with Ammo Mig nature effects Light Dust. Once dry, I blended them down using a stiff, short-bristled brush. The effect is subtle and not too clear in photos but it adds a touch of realism that I’m happy with. I also experimented with the same technique on a few underside panels to add tonal variation.


Working with pigments
The next step was adding exhaust stains. In the past, I’ve always airbrushed them using Tamiya X-19 Smoke, but this time I wanted to try something new. I had read that you could also replicate exhauste stains using pigment powders. So I decided to give them a shot.
First, I sealed the surface with a coat of flat varnish. Then I applied a thin layer of Ammo Mig P022 Ashes White to the center of the exhaust stains. Followed by Ammo Mig P023 Black Smoke around the edges. Once both pigments were in place, I carefully blended them together to create a smooth, realistic transition.


As one of the final steps, I added some subtle chipping effects using an AK Interactive weathering pencil. In particular, I focused on areas that would naturally show wear. Additionally, I treated the exhausts with rust-colored pigments to enhance depth and, as a result, give them a far more realistic look.
With the weathering complete, it was time to glue the final pieces in place. To finish off the build, I added an antenna wire using EZ-Line elastic thread, which gives a convincing scale appearance and adds that final touch of detail.


The final result
Building the Arma Hobby 1/72 scale Hurricane Mk I was an absolute joy. The kit comes with an impressive level of detail straight out of the box. Which really helps bring the aircraft to life. Overall, the model went together smoothly, although I did encounter a few fit issues when closing the fuselage halves and attaching the wing assembly. To be fair, that might have been due to my own handling rather than the kit itself. In the end, I’m really pleased with how the Hurricane turned out.


Indeed is a very nice kit. The only flaw is on the vertical stabilizer that is not aligned with the axis of the aircraft.
Thank you. The offset of the vertical stabilizer is by design, this is to counter the torque of the propeller.